
エンジニアの皆さんはサーバOSを検証で触って触って触りまくりたいと思いますが、本番サーバを気軽に触るのは怖いですよね。
現在は無料で自分のPCに仮想化ソフト入れるのも可能な時代になってきています。早速その仮想化ソフトをインストールしてみたいと思います。
今回はオラクルが出している「virtual box」です。早速ダウンロードしてインストールしてみます。
virtualbox インストール方法
まずはダウンロードする。まだしていない方はvirtual boxのダウンロードからどうぞ
上記からダウンロードページに移動する。
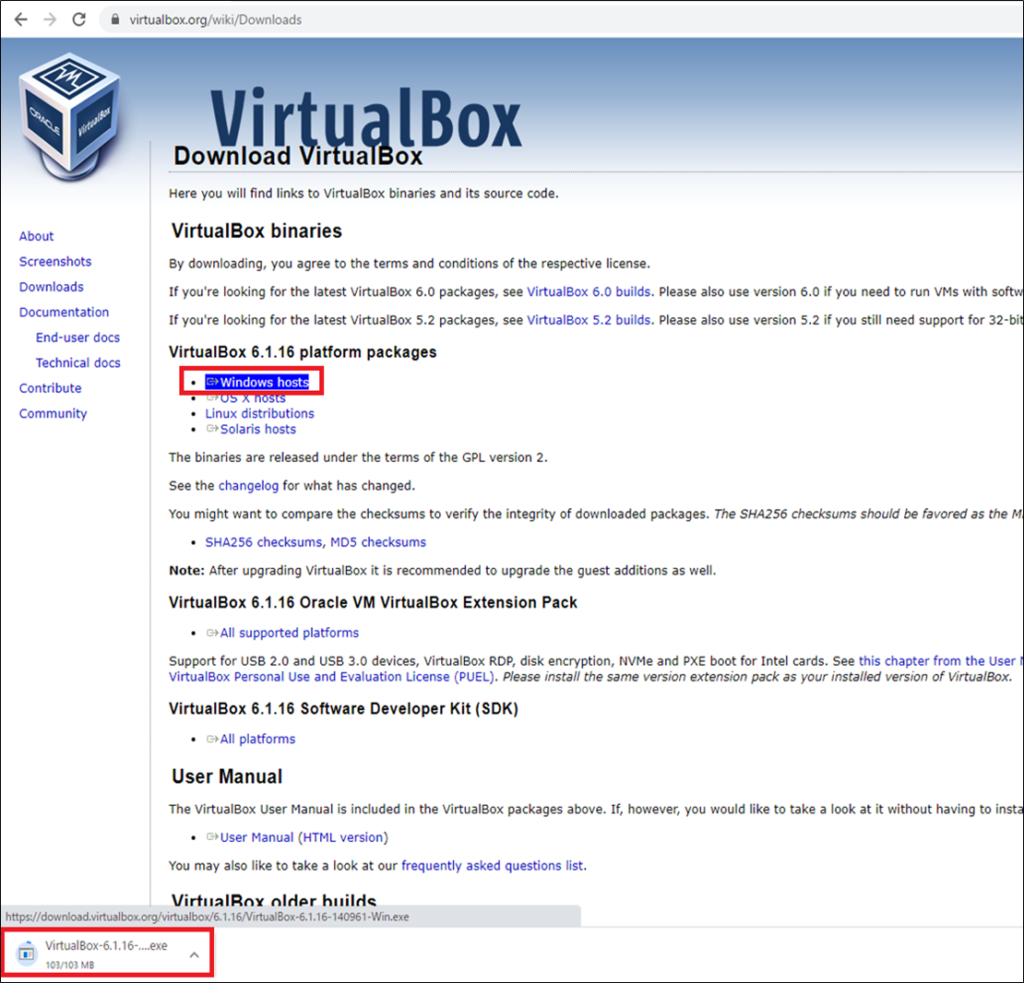
「windows hosts」をクリックするとダウンロードが始まります。ダウンロードが完了するのを待ちます。完了したら下記ファイルがダウンロードフォルダにできています。

「Virtual Box-6.1.16-140961-Win.exe」をダブルクリックしてインストーラーを起動する。
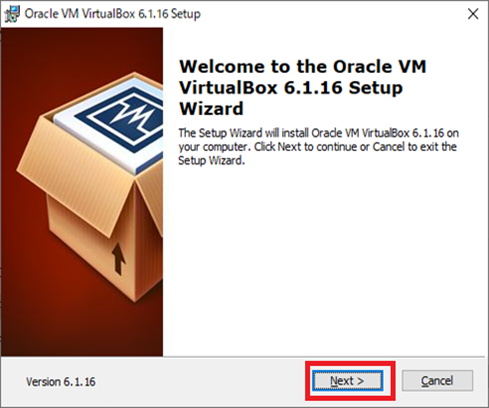
起動したら「Next」クリック。
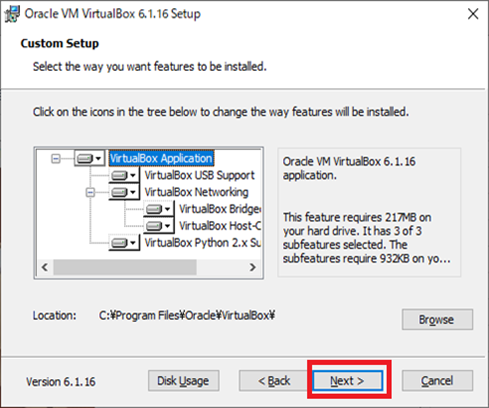
Custom Setupできますが、ここは何も触らず「Next」をクリック
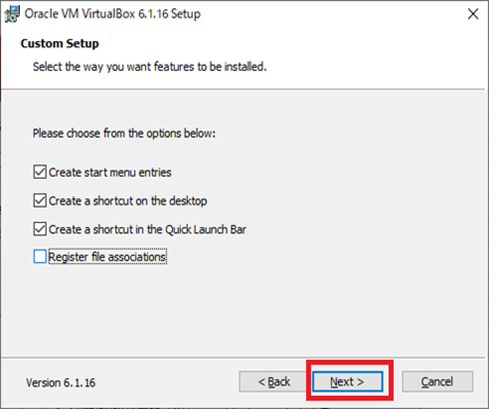
ここも何も変えずに「Next」クリック
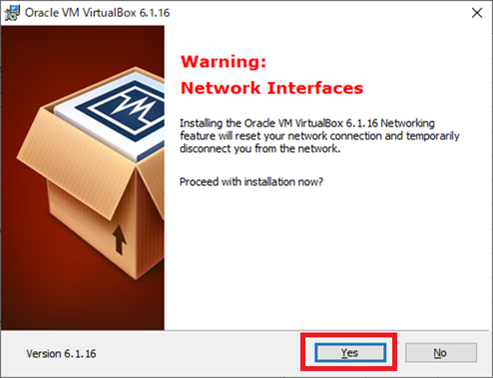
Warningが出ていますがそのまま「Yes」をクリック。ネットワークインターフェースをいじるので、PCのネット環境が一時的に切れてしまいますよと警告しているだけです。
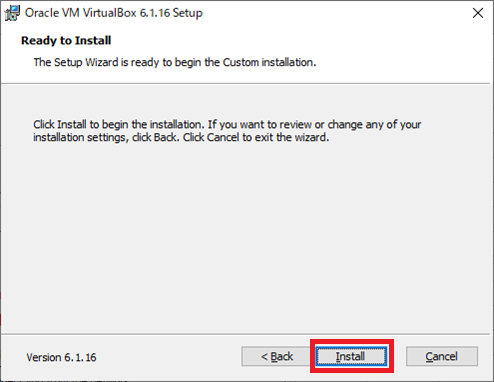
「Install」をクリック。
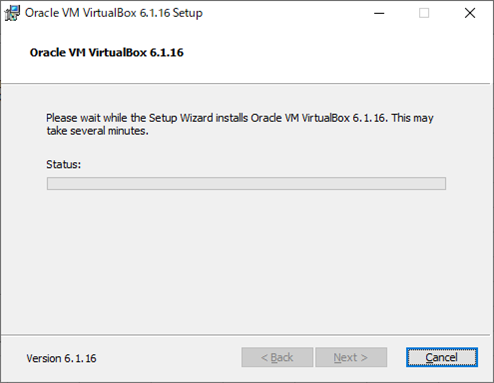
インストールが完了するのを待ちます
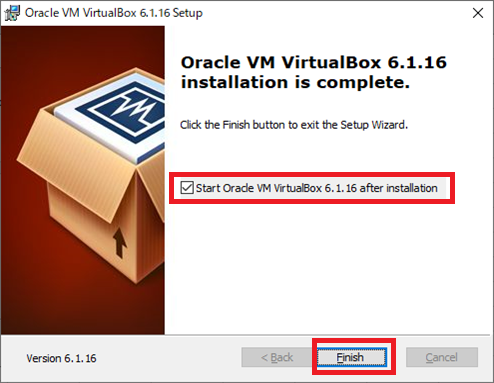
完了しましたらそのまま「Finish」をクリック。すぐにvirtual boxを立ち上げないのであればチェックボックスをはずす。
今回はすぐに立ち上げようと思いますので、チェックボックスはそのままチェックしておきます。

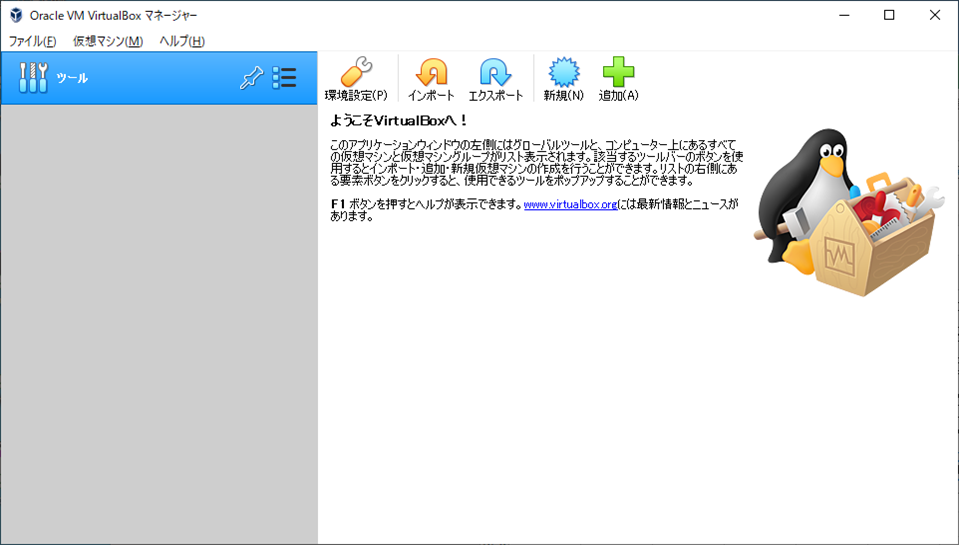
立ち上がってきました。成功です。
Extension Packのインストール
ここでもう一つインストールします。仮想環境でもUSBやRDPが使用できるようにするためのものになりますので、よくvirtual boxとセットでインストールされます。
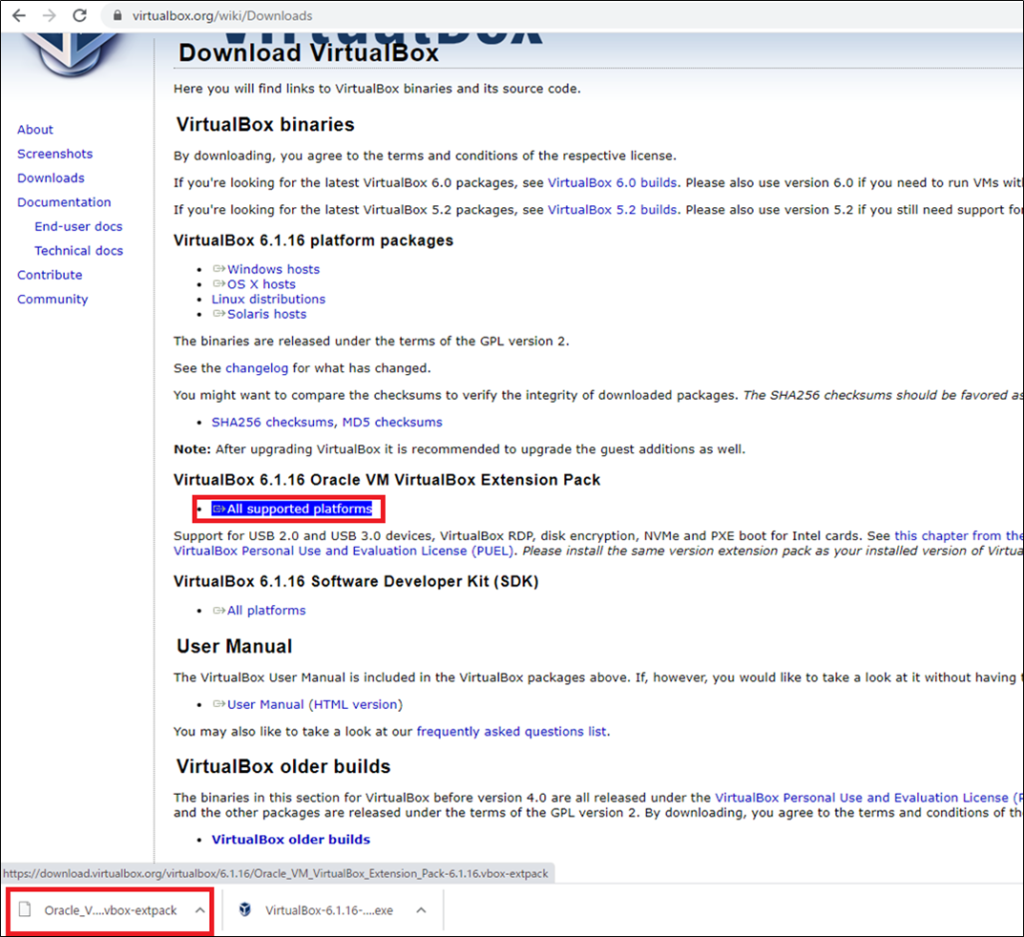
上記virtual boxのダウンロードページから「All supported platforms」をクリックしてダウンロードする。ダウンロード完了するまで待ちます。完了したらダウンロードしたフォルダに下記ファイルができていると思います

「Oracle_VM_VirtualBox_Extension_Pack-6….」ダブルクリックして起動する。
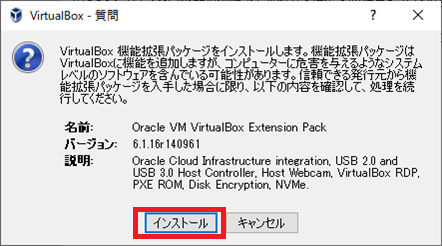
起動してきたら「インストール」をクリック
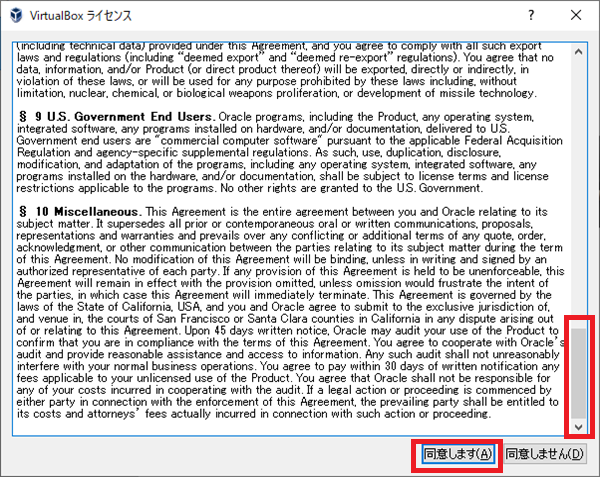
Virtual boxのライセンスが表示されるので、一番下までスクロールして「同意します(A)」をクリック
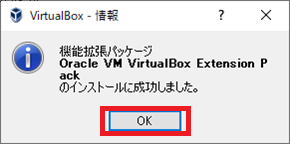
成功しましたと出たら成功です。「OK」をクリックしましょう。
これで完了になります。
それではWindowsServerやLinuxサーバ、windows10などを入れて色々試してみてください。