
windows server2016のActive Directoryの初期設定をやったことがない。
忘れて久々に行うけど設定項目を忘れてしまった。
そういったあなたの為の記事となります。
Active Directory設計経験豊富な筆者が図付きでご紹介しますので、きちっと設定できます。
この記事を最後まで読んで設定できたか確認してください。
Active Directory設定
windows server2016のActive Directoryの初期設定をしていきたいと思います。
ADのインストールがまだの人はこちらを参照してインストールしてください。
まずは設定内容を決めておこうと思います。
- コンピュータ名:WIN-JCI1MP1MGS2
- ドメイン:example.com
- Netbiosドメイン:EXAMPLE1
- IPアドレス:192.168.11.40
- DNS:127.0.0.1
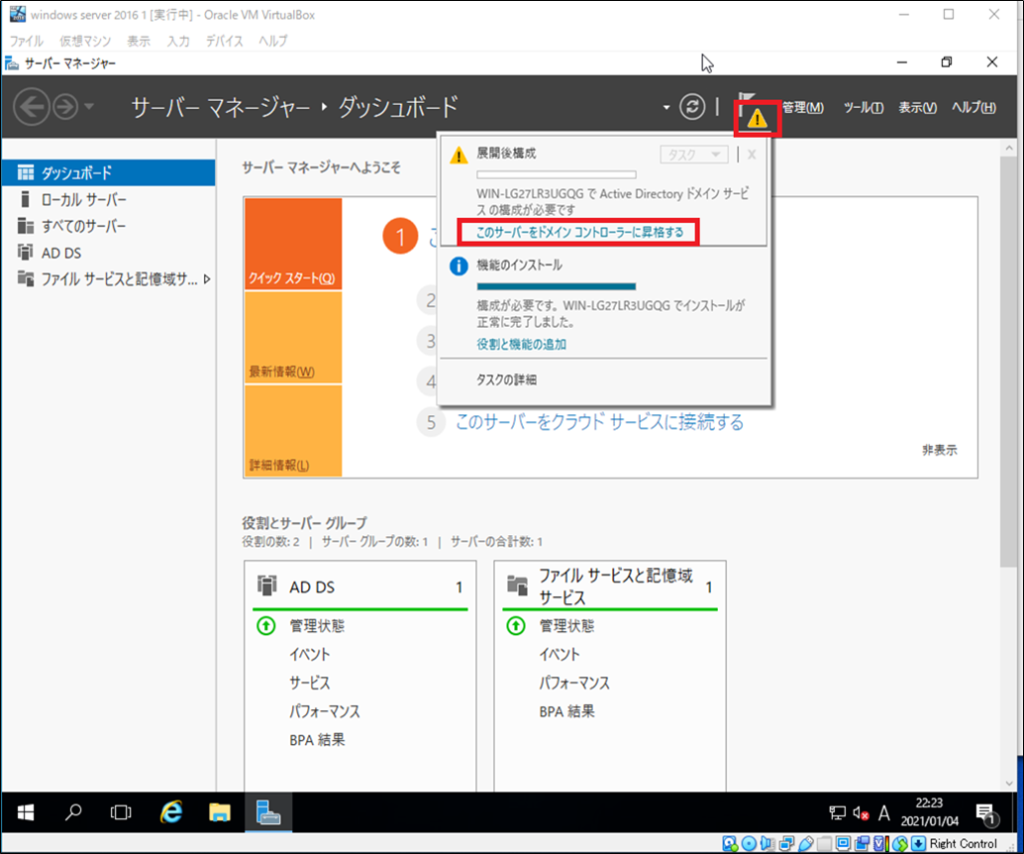
Active Directoryのインストールが完了しましたが、ドメインコントローラがないので「!」マークがでていますので「!」をクリックして「このサーバーをdomainコントローラに昇格する」をクリックします。
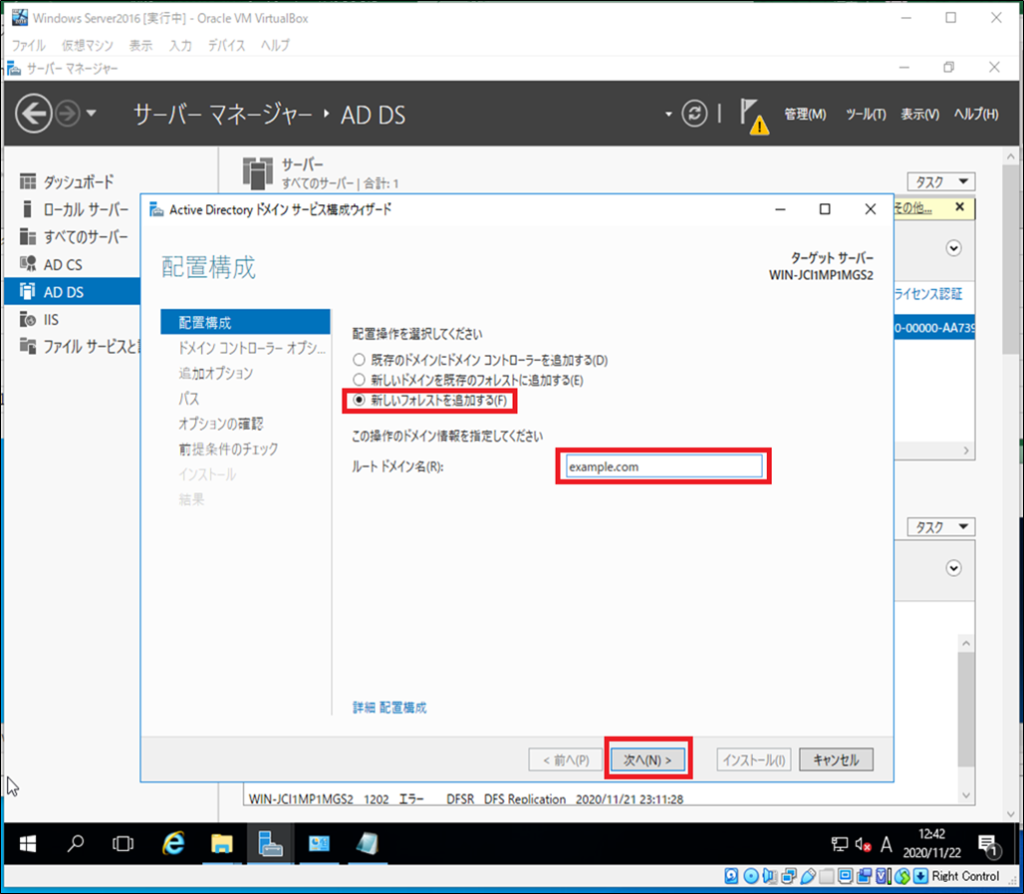
「新しいフォレストを追加する(F)」にチェックを入れて「ルートドメイン名(R)」にドメインを記入する。今回は無料で使用できる「example.com」を記入して「次へ」をクリックします。

パスワードに復元する時のパスワードと確認を入力して「次へ」をクリックします。

そのまま「次へ」をクリックします。

NetBIOS ドメイン名に自動で今回のドメインが入りますので、そのまま「次へ」をクリックします。
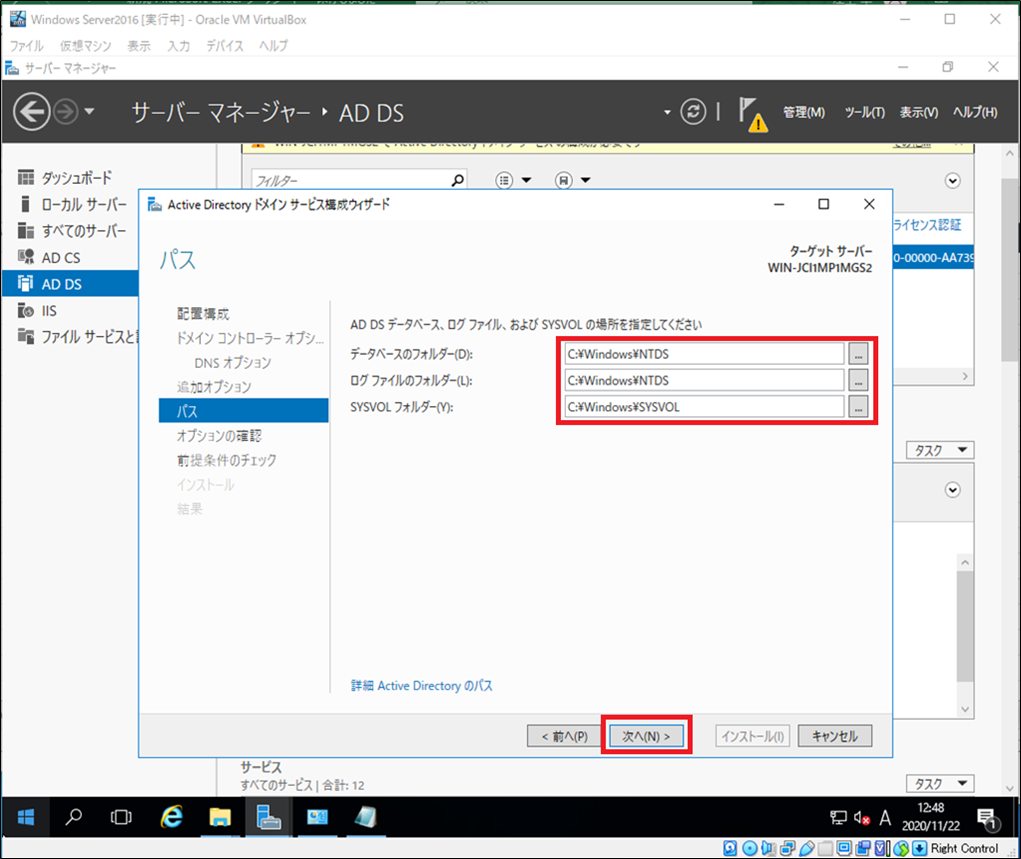
データベース、ログ、シスログの保存場所を記入する。今回はそのまま「次へ」をクリックします。
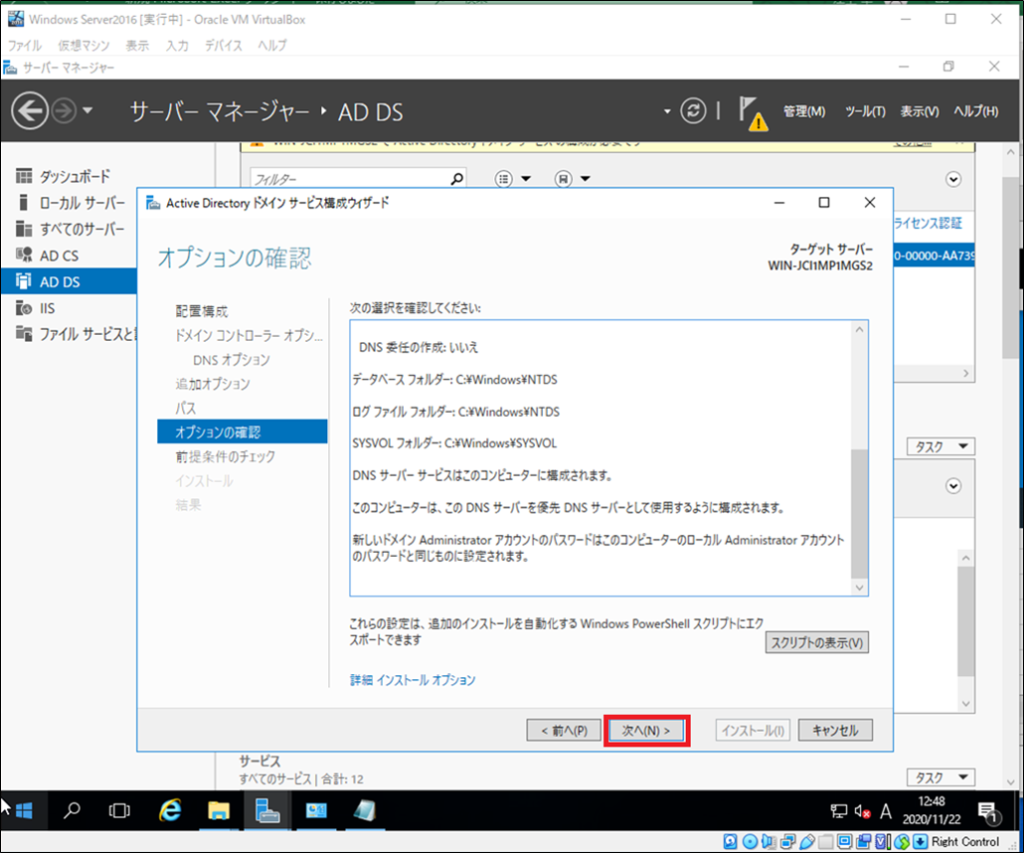
確認してそのまま「次へ」をクリックします。

「インストール(I)」をクリックします。
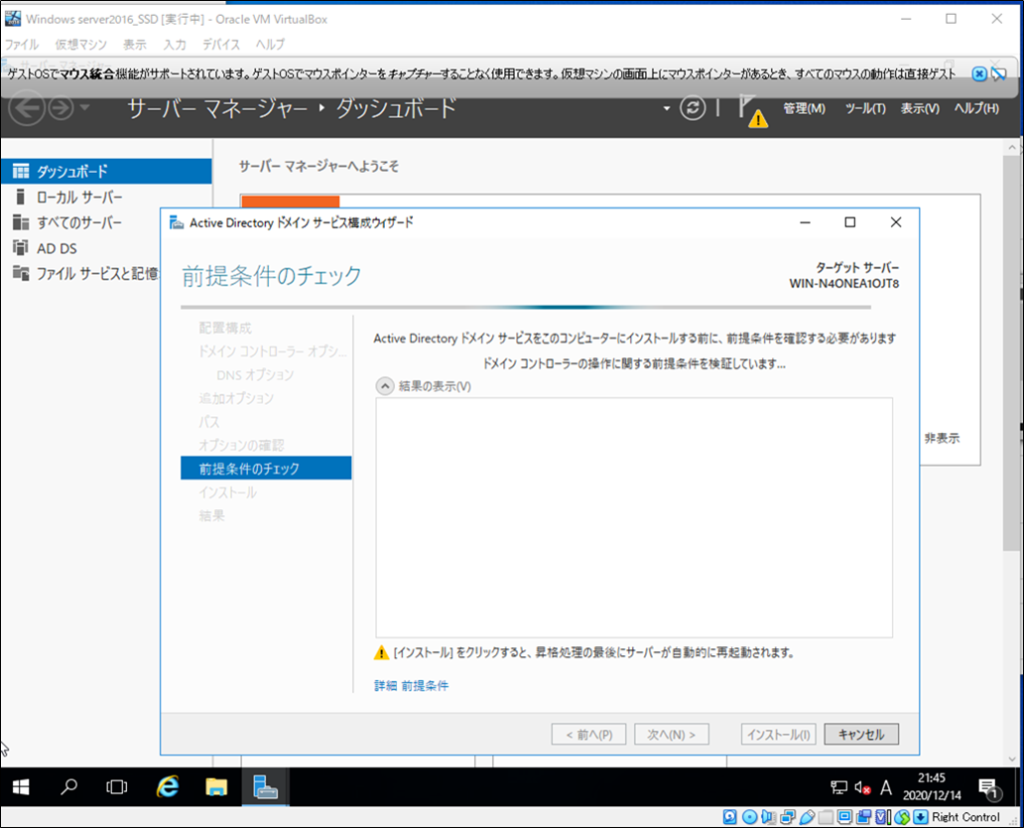
インストールされるのを待ちます。
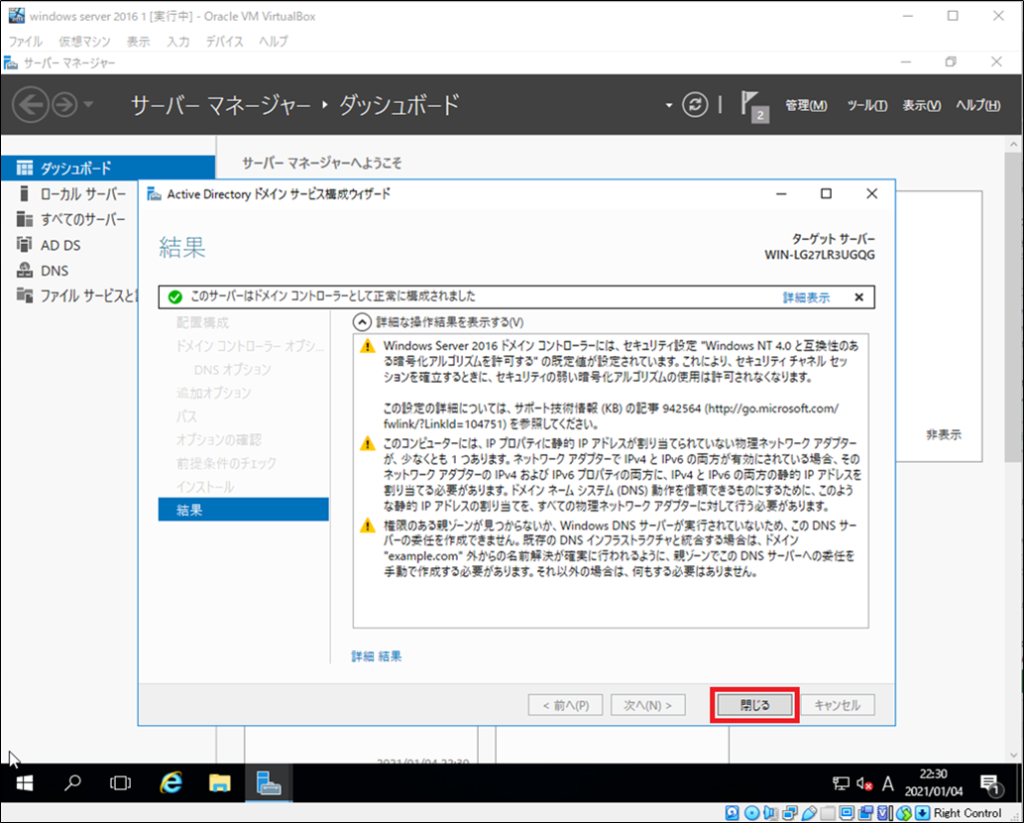
インストールが完了したら「閉じる」をクリックします。
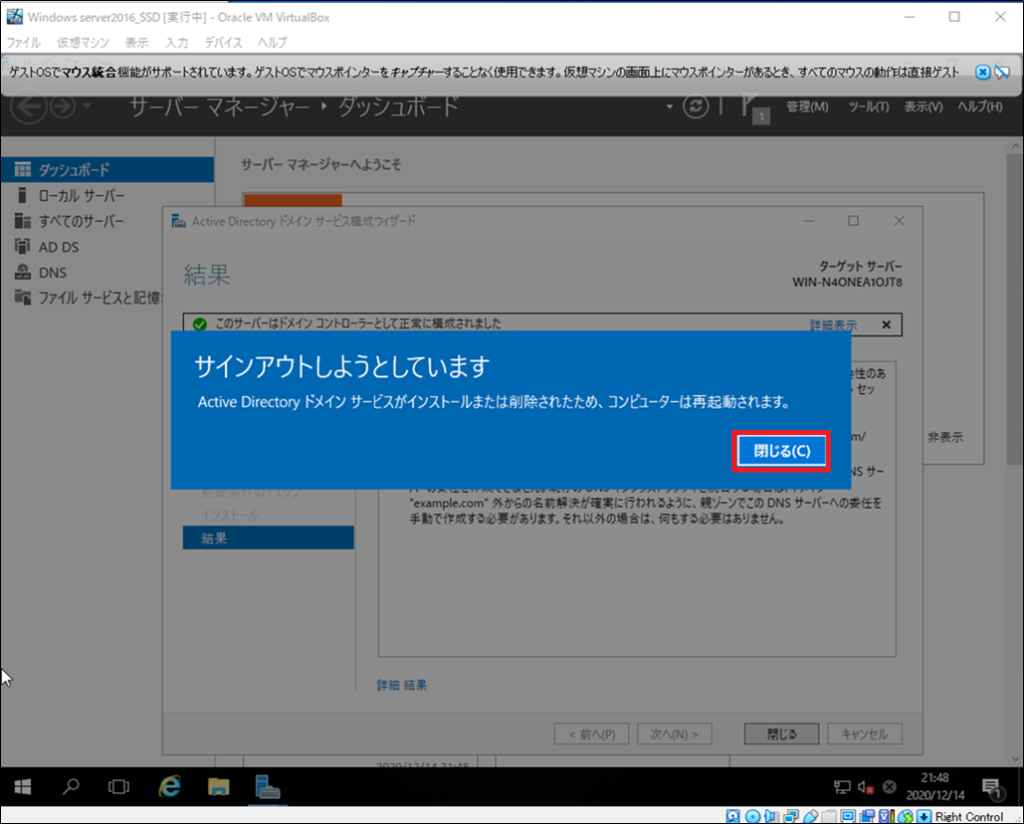
インストールが完了したら再起動を促されるので「閉じる(C)」をクリックします。再起動して立ち上がってくるのを待ちます。

「入力」から「キーボード」から「送信 Ctrl+Alt+Del」をクリックします。
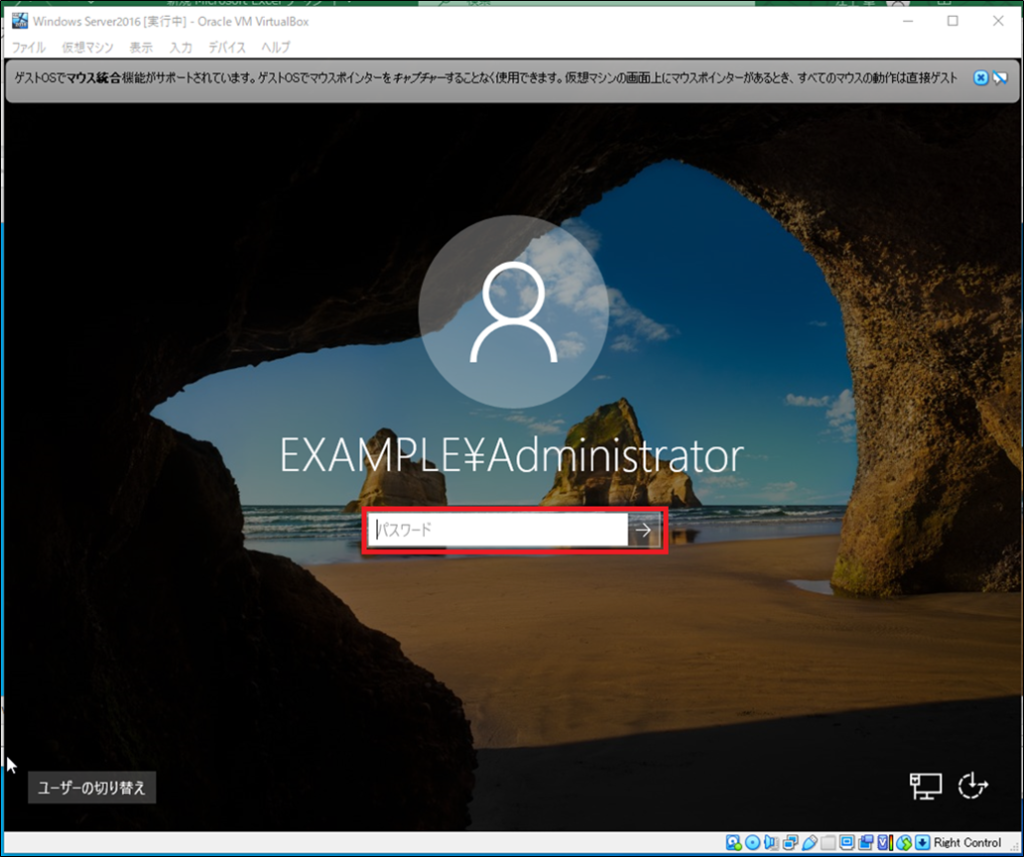
Administratorのパスワードを入力してログインします。
これでActive Directoryの設定は完了です。
